A few months ago, my cousin held an online party for Jamberry Nail Wraps. I'd never heard of them, but I pretty much jumped on the wagon immediately because, like any girlie party (Tupperware, Pure Romance, and the like), there were free prizes for participating in the Facebook group - and we all know how much I love free things!
Anyway, I ended up choosing only one design to buy: "Aloha Flower" (unfortunately, this style isn't in the shop anymore, so I can't give you a link for it). A huge reason I picked that one is because it totally matches my awesome tank top that I got early this summer! And, while I haven't posted any clothes-matching manis on the blog yet, I LOVE it when my nails match my clothes. (Check it: here and here.)

Phone quality, because I forgot to take a picture with the tank top when I had my camera and lamp set up.
I finally decided to try out the wraps today, and I'm pretty impressed! The instructions mentioned "if applying over lacquer," which I took to mean that it's safe to apply on top of polish. (They sell a few patterns with a clear background.) I threw on my usual two coats of Sally Hansen Hard as Nails, to help my nails stay stronger with extra layers of stuff on them.

Application of the wraps is a little bit tricky, but it's a pretty simple concept. You pick the wrap that best fits your nail and grab it with either tweezers or an orangewood stick, then heat it up. The website and instructions tell you to use a special mini heater (which of course Jamberry sells), or else use a blow dryer. I don't own a blow dryer, so I used my bedroom space heater, and it worked just fine! Hold the wrap in front of the heat for a few seconds until it warms up, then stick it on your nail. Cut off the excess, then file off any bits of wrap extending above the edge of your nail.

I'm holding Zoya "Wendy" in this one, if you're curious.
I found that it was easier to avoid wrinkles on the edge of the wrap if I cut it fairly close to the length of my nail before putting it on. For the first three nails, I left the wraps at their full length - one and a half inches - and I ended up with LOTS of wrinkles at the very tip of my nails. (Most of my nails are close to half an inch long. That's a LOT of excess wrap!) By my ring finger, I realized that if I cut the wrap much shorter first, it was less likely to wrinkle at the tip.

Pretty severe wrinkling here.
I wanted to paint one nail on each hand on my own - I happen to have the perfect blue to match the background of this pattern, and a pretty good green and orange and of course a white - but I chickened out. For one thing, it was getting too close to dinner time, and for another, I didn't want to have eight computer-perfect designed nails and then two nails that look just a little too wibbly. But each Jamberry set comes with two stickers of every size, so I'll be able to do this again, and maybe then I'll try my hand at painting to match!

Here, I'm holding Zoya "Mitzi."
(I think it's worth noting that the pattern doesn't look as dot-y as it does in the super closeup pictures that I took. To the naked eye, this is a perfectly smooth pattern.)
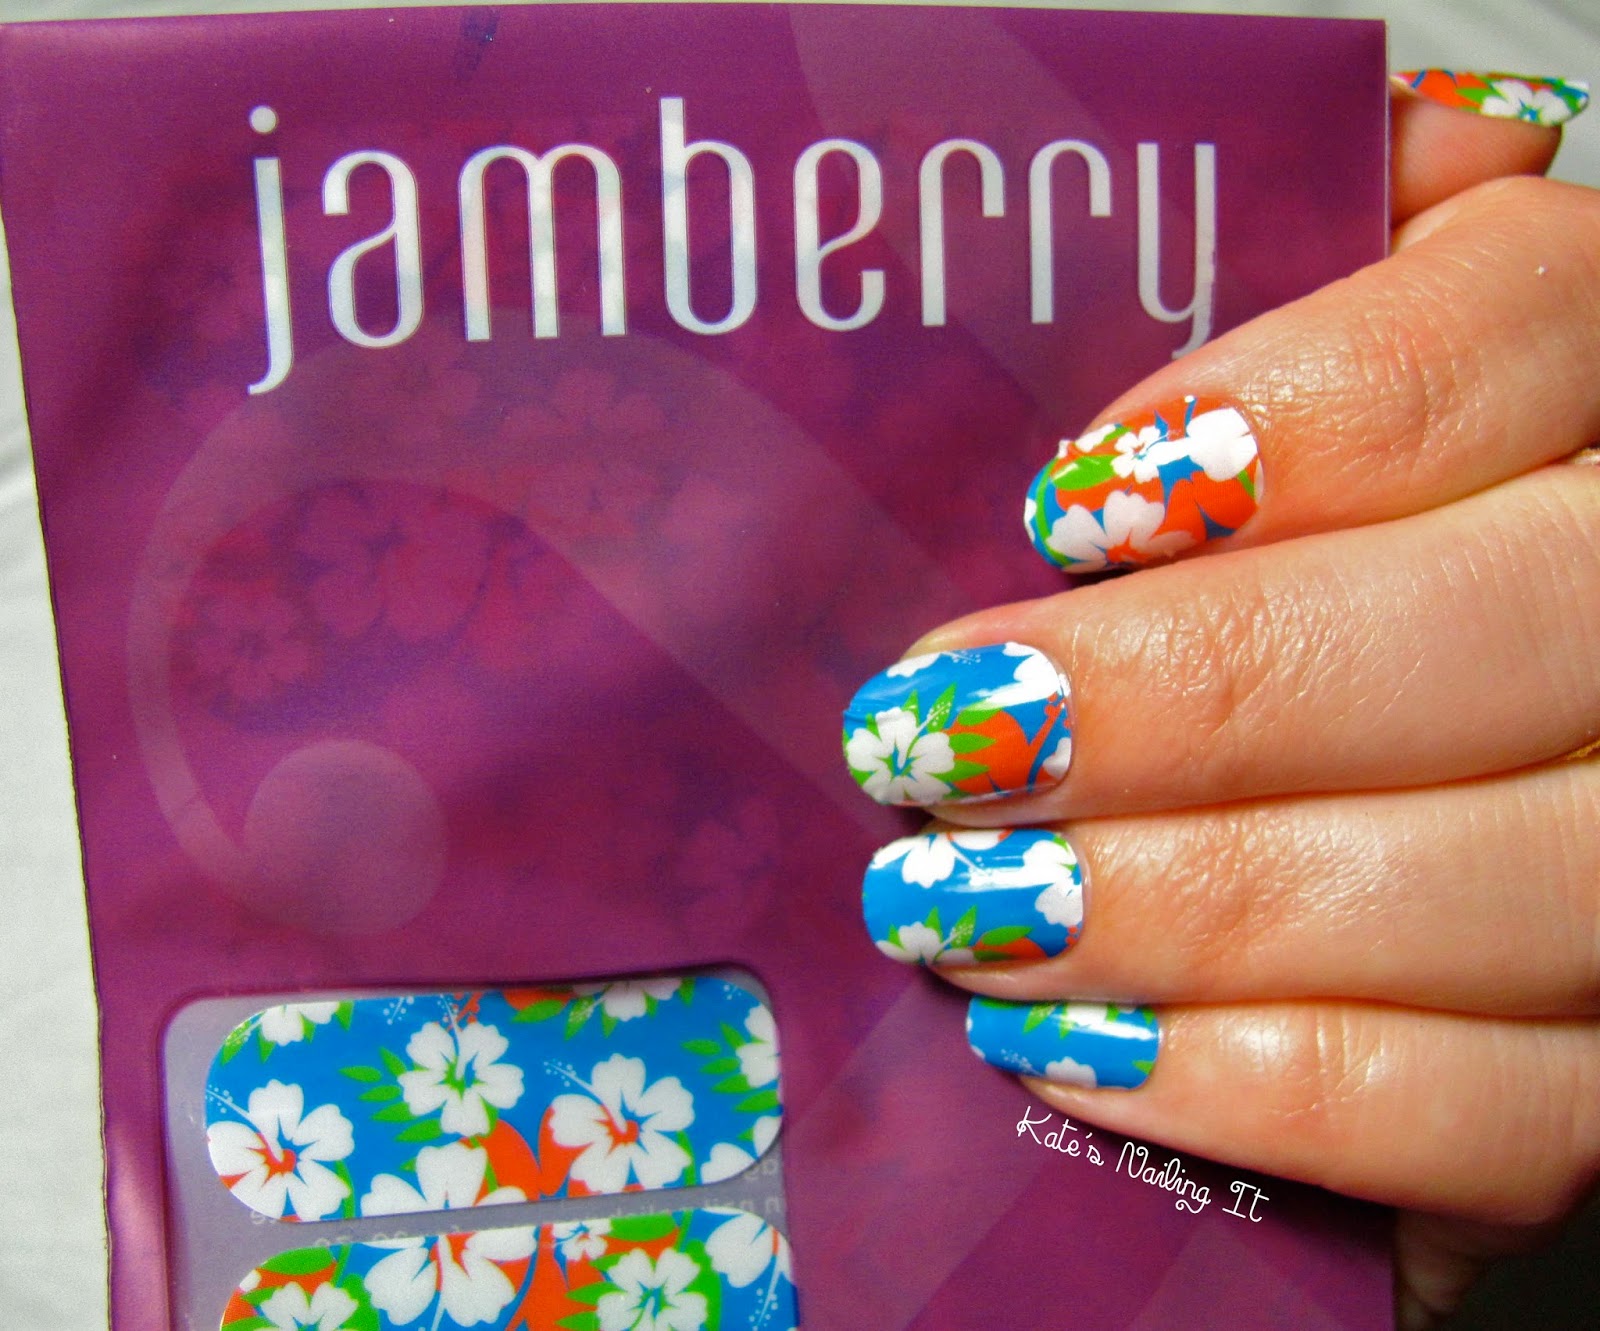
Obligatory "holding the product" shot, even though it's fairly awkward to hold the floppy envelope for a picture.
Also, will my pinky nail ever NOT be partially hidden underneath my ring finger?
Jamberry says that these wraps can last up to 14 days. I definitely won't be wearing them for that long, because I'll need to change my nails in order to write another blog post! I'll update this post to talk about how they fare after the weekend, and I'll also mention how well they come off.
Update 9/7/14
I took the wraps off late Saturday night. Predictably, the wraps that had wrinkled on the edges started to peel off a little bit. The peeling wasn't so bad that the wraps risked falling off, but it did make my nails sort of painful, like they had teeny tiny swords on the edges of them. On the few nails with perfect application, I had no peeling on the edges of my nails and would have been happy to keep them on until I was ready to change my nails!Let me just say this before I describe the process: DO NOT, UNDER ANY CIRCUMSTANCES, WEAR THESE ON TOP OF ANY KIND OF NAIL POLISH, LACQUER, OR NAIL STRENGTHENER/HARDENER.
The website and packaging give you three different ways to remove the wraps: re-heat them in front of your heat source and peel them off; soak your nails in acetone for a few seconds and peel them off; or soak your nails in warm water for a few seconds and peel them off. NONE of these methods work properly if the wraps were applied over lacquer. It seems that the glue on the wraps bonded to the strengthener on my nails, making it very difficult to take the wraps off. Everything was a sticky mess. What ended up working was: I dipped an orangewood stick in acetone and worked it underneath the wraps, then pulled them off and cleaned the goo off my nails with more acetone. Since I had the nail strengthener on all of my nails, I can't say for certain whether the wraps would leave a gooey mess on bare nails; I certainly hope not!
All in all, I was quite happy with these wraps and I definitely recommend trying them out!
Hi Kate,
ReplyDeleteI found your blog from you post on Reddit. I think this post is really well written! I've had mixed experiences with nail wraps myself... I find putting them on my left hand to be really hard.
Please check out my blog www.natillie.com! I would really appreciate it if you followed me on Bloglovin' as well. https://www.bloglovin.com/blog/12696239
Natalie :D
Ooh, you're my first Bloglovin' follower! Hooray! I've seen mixed opinions about wraps on the internet before, so I was really pleased to find that I like these! Have you used Jamberry specifically, or other brands? I'll be sure to check out your blog! :)
Delete