I'm a Trekkie. I like the new reboot movies and I've seen most of the original movies (minus the ones that were evidently so horrible that my Dad banned them from the house as I was growing up), and I'm not too proud to admit that I watched a handful of Enterprise back in the day, but I am a Next Generation girl through and through. The show may have ended when I was three, but I grew up watching reruns and taped episodes. (Remember the days of VHS?) When I was in elementary school I got in an argument over whether Star Wars or Star Trek was better, and I almost ended a friendship over someone thinking it was called "Star Track."
So when
Gothic Gala Lacquers announced the re-release of their Holo-Deck collection, I was ecstatic! I'd seen pictures of it from when she first released it a year ago and I was really disappointed that I'd missed it. The moment I saw the photos on her Facebook page I knew I'd need the entire collection. At first, I thought it would have been inspired by either the original series or the reboot, so I was extra excited when I saw the names and realized that this collection gathers its inspiration from Next Generation!
This post is going to be incredibly photo-heavy, because I couldn't resist capturing tons of macros of these amazing polishes. To save a little bit of time, the formula on these polishes is all pretty much the same: opaque at two coats, a tiny bit streaky but evens out perfectly with top coat.
Make It So
Inspired by Captain Jean-Luc Picard and his favorite way of issuing an order, Make It So is a lovely raspberry-red scattered holo. It's a bit less raspberry and more true red in sunlight, but inside it definitely has that juicy, berry-red look to it.
The holo effect is pretty subtle in the light of my lamps, but take it outside and WOW! Truly stunning. I hadn't had enough holos in my life until now. I'm very happy that I bought this collection in its entirety!
My Partner In Crime
This mustard-y yellow polish is inspired by the character Geordi La Forge. Normally I wouldn't be crazy about this shade of yellow, but it is absolutely the EXACT shade of yellow that Geordi and the other engineering officers wear in Next Generation, so I love it.
The holo effect is much more subtle than Make It So. Unfortunately I didn't have any direct sunlight when I swatched this one, but you can see it pretty well in this bottle shot:
The Enterprise
It should be pretty obvious what the inspiration behind this polish is - the Federation Starship Enterprise herself!
The Enterprise is a lovely shade of gray. Inside, whether under artificial light or indirect sunlight, there's a hint of purplish undertones to it, though my camera didn't really pick that up. The holo sparkle is absolutely brilliant!
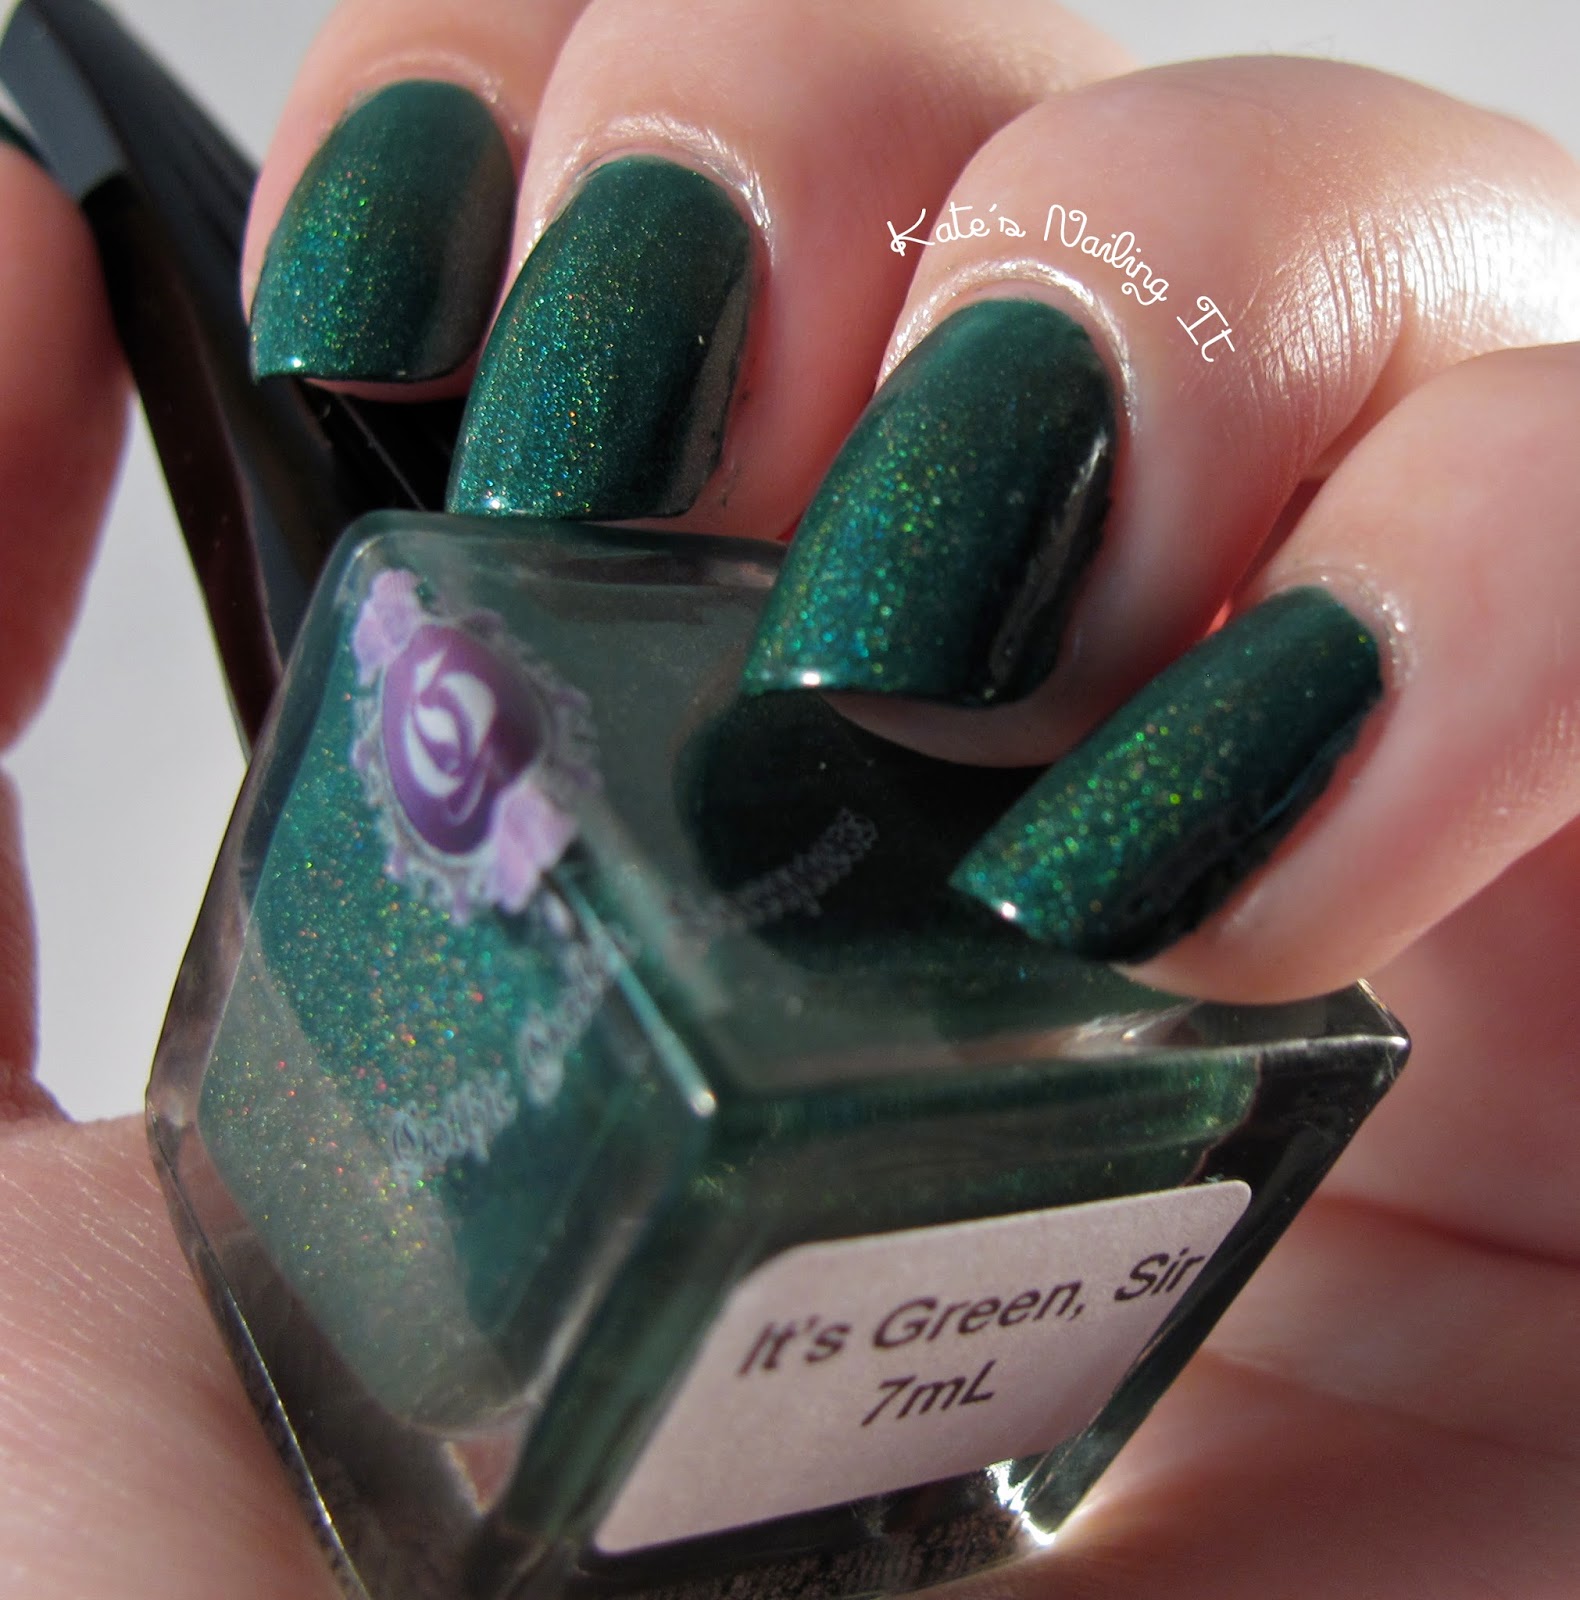
It's Green, Sir
This lovely forest green shade is inspired by Data. (If it's inspired by Data, shouldn't it be called "It Is Green, Sir"? hehe.) Data has been my favorite character for my whole life.
This shade of green is super versatile. I can see it working perfectly for a Spartan green-and-white mani, a Christmas mani, and pretty much any time I need a holographic green. It's a totally true green - doesn't really lean yellowish or blueish.
Are you ready for this storm of macros?
The Dancing Doctor
Inspired by Doctor Beverly Crusher, The Dancing Doctor is a gorgeous shade of blue. Like It's Green, Sir, it's a true blue that doesn't really lean greenish or red - although in some lighting, it does exhibit ever-so-slightly blurple undertones. But in most lighting, it's very very blue.
And the holographic sparkle is quite pronounced, even in dimmer lighting! I love it.
When taking macros of this one, I thought perhaps I was moving too much and that's why the sparkles never appeared to be in focus. But I think that the holo dust in Dancing Doctor is actually shaped like little Ts! They looked like that in every macro, no matter how still I held my hand.
I thought I'd try out a new angle for a macro shot - what do you think?
The Search For Spock
The Search For Spock actually takes its inspiration from the original series - it shares a name with the third Star Trek movie.
Oh. my. goodness. This polish is absolutely 100% breathtaking. It has some small flakie glitters that none of the other polishes in this collection have, and it totally looks like space. It's like a one-step galaxy mani! I'm totally in love. The holo effect is the most prominent in this one, reflecting rainbows even in dim indoor lighting.
The formula was a tiny bit thinner than the others - it was mostly opaque at two coats, and while there wasn't really a visible line where the whites of my nails start, it definitely looked lighter at the tips of my nails. I used three coats of The Search For Spock in the photos.
This collection is sadly no longer available in Gothic Gala Lacquer's shop as of 9/20/15, but who knows, maybe Gothic Gala will reboot these beauties again in another year! If you missed out on these, I highly recommend checking out some of Gothic Gala's other holo polishes - I haven't used any myself, but judging by the photos, they all look just as incredible as these six.
Which polish from this collection is your favorite? Are you also a Star Trek fan? Let me know in the comments!