Remember a few months ago when I shared my collection of Zoya Pixie Dusts, and I said that three of the colors would be perfect for a Halloween manicure? Well, right before I discovered the nail art challenge that I've been doing all month, I combined those three colors for a fun stripey mani.
Zoya Beatrix, Carter, and Dahlia turned out to be absolutely perfect together for Halloween! I used a makeup sponge to put them on for a gradient look.
I realize that I could have used this for the challenge theme on the 7th, when the theme was patterns, but that felt a little like cheating since I had painted this design over a week before. So you guys get a bonus mani this month! October is fun. :)
What is your absolute favorite manicure design for Halloween? Let me know in the comments!
October 29, 2015
October 28, 2015
October nail art challenge day 28: Monsters
Well, here we are. The second to last theme of this year's Halloween nail art challenge. Today's theme is monsters, and I cooked up a lot of them on my nails!
My nails house a mummy, Frankenstein's monster, a witch, and a vampire.
On the opposite hand, I painted something that abstractly represents each creature - except for the mummy, for which I couldn't think of anything else to represent. So I painted the Bride of Frankenstein['s mosnter], some stitches to represent the monster himself, witch-y colored stripes, and dripping blood. (Sadly, the purple that I used didn't show up very well at the top of my ring finger - nor did the drips show up very well on top of the purple metallic background. Oh well!)
On my thumbs, I painted a werewolf on the left and a full moon (sort of) on the right.
I used a whole bunch of different polishes for this look, and once again it's much easier if I just list them rather than describe which polish I used where.
Salon Perfect: Sugar Cube, Oil Slick, Loopy Lime, Escape to Neverland, A Royal Affair, and Traffic Cone
Zoya: Ziv, Nyssa, and Ana
Finger Paints: Monet Money and Ch-art-coal Black
OPI My Dogsled is a Hybrid
China Glaze Intelligence, Integrity & Courage
Heather's Hues Vampirette
Creative Cuticles Nail Polish O Negative Please
Sally Hansen Big Smoky Topcoat
I want to point out the awesomeness that is the vampire's skin color. I applied a coat of Vampirette, thinking that I would do a smaller vampire face on a purple background, but then decided against that. And I didn't want to bother with removing the polish and starting over from basecoat, so I put a coat of Ana on top of the purple. It turned out to be a sort of grayish-purple skin color, perfect for the skin of the undead!
Other than the witch-y stripes and the dripping blood, which I made using vinyls from KB Shimmer and Nails Redesigned, respectively, all of these monsters were made totally freehand. It took forever but it was a lot of fun!
All that's left in this month's challenge is nails to match my costume. My options are limited because of limited nail polish technology in the 1920s, but I'm pretty excited for my costume! We're going to be having some relatives over for the weekend of Halloween, so I might not have that blog post ready until the Monday after Halloween, but you'll definitely get to see my design for my flapper costume!
What are you dressing up as for Halloween this year? Do you plan on painting your nails to match? Let me know in the comments!
Once again, I had to use the dreaded flash because the deep green of Frankenstein's monster wouldn't show up without it.
My nails house a mummy, Frankenstein's monster, a witch, and a vampire.
On the opposite hand, I painted something that abstractly represents each creature - except for the mummy, for which I couldn't think of anything else to represent. So I painted the Bride of Frankenstein['s mosnter], some stitches to represent the monster himself, witch-y colored stripes, and dripping blood. (Sadly, the purple that I used didn't show up very well at the top of my ring finger - nor did the drips show up very well on top of the purple metallic background. Oh well!)
On my thumbs, I painted a werewolf on the left and a full moon (sort of) on the right.
I used a whole bunch of different polishes for this look, and once again it's much easier if I just list them rather than describe which polish I used where.
Salon Perfect: Sugar Cube, Oil Slick, Loopy Lime, Escape to Neverland, A Royal Affair, and Traffic Cone
Zoya: Ziv, Nyssa, and Ana
Finger Paints: Monet Money and Ch-art-coal Black
OPI My Dogsled is a Hybrid
China Glaze Intelligence, Integrity & Courage
Heather's Hues Vampirette
Creative Cuticles Nail Polish O Negative Please
Sally Hansen Big Smoky Topcoat
I want to point out the awesomeness that is the vampire's skin color. I applied a coat of Vampirette, thinking that I would do a smaller vampire face on a purple background, but then decided against that. And I didn't want to bother with removing the polish and starting over from basecoat, so I put a coat of Ana on top of the purple. It turned out to be a sort of grayish-purple skin color, perfect for the skin of the undead!
Other than the witch-y stripes and the dripping blood, which I made using vinyls from KB Shimmer and Nails Redesigned, respectively, all of these monsters were made totally freehand. It took forever but it was a lot of fun!
All that's left in this month's challenge is nails to match my costume. My options are limited because of limited nail polish technology in the 1920s, but I'm pretty excited for my costume! We're going to be having some relatives over for the weekend of Halloween, so I might not have that blog post ready until the Monday after Halloween, but you'll definitely get to see my design for my flapper costume!
What are you dressing up as for Halloween this year? Do you plan on painting your nails to match? Let me know in the comments!
Labels:
Challenges,
China Glaze,
Creative Cuticles Nail Polish,
Finger Paints,
Halloween,
Heather's Hues,
KB Shimmer,
Nail art,
nailartoct,
Nails Redesigned,
OPI,
Sally Hansen,
Salon Perfect,
Zoya
October 26, 2015
October nail art challenge Day 25: Blood
Warning: this one's a bit gory! If you're grossed out by gore, you might want to skip this post.
I'll throw the challenge image up top this time, to buffer the gore and make it easier to avoid seeing:
I TORE UP MY THUMB NAILS CLAWING MY WAY OUT OF MY OWN GRAVE.
Just kidding.
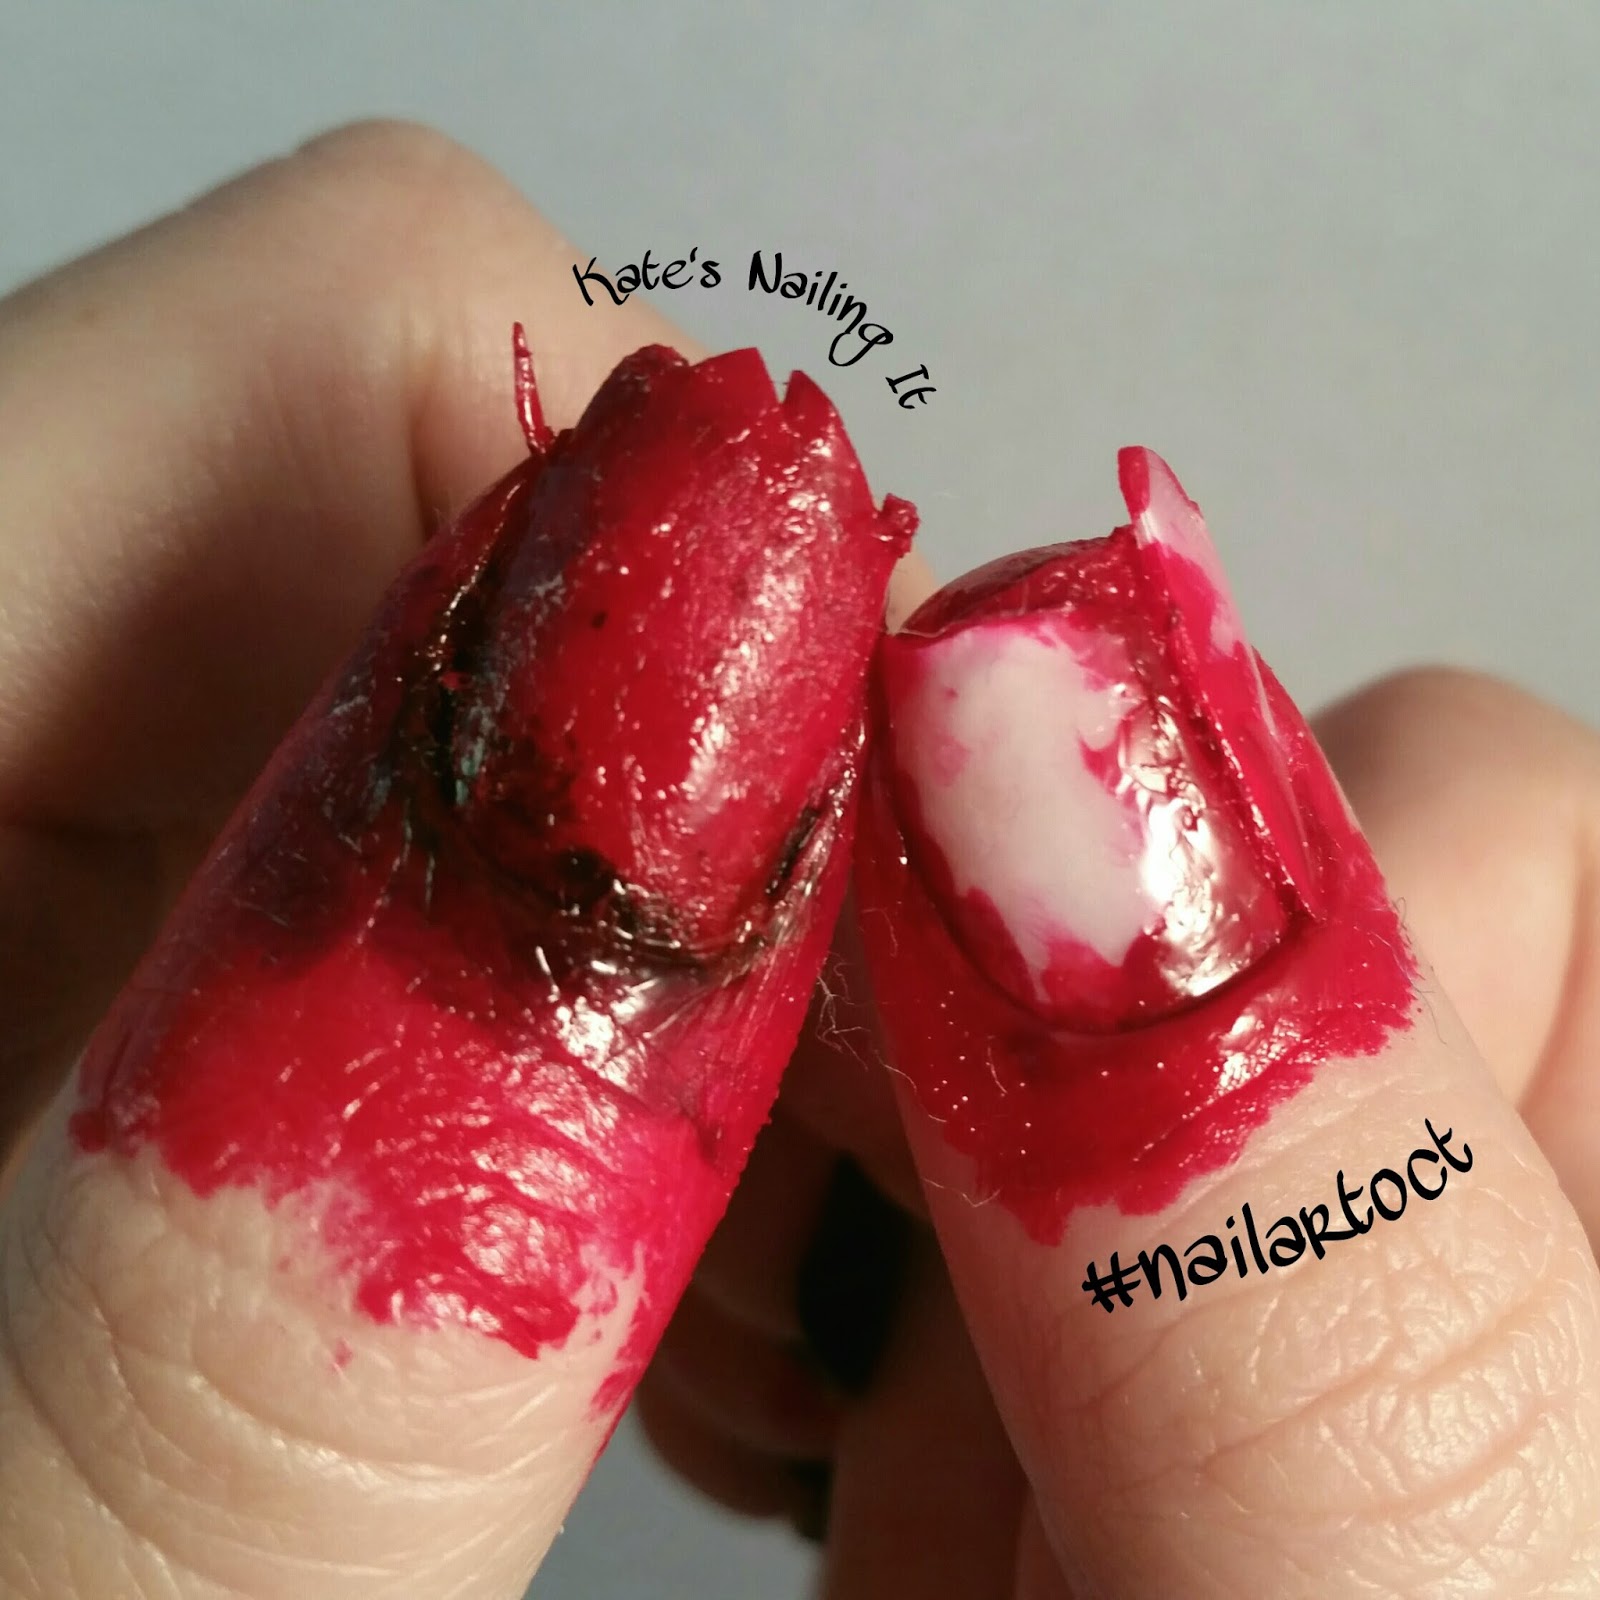
Actually, I did decide at the last minute to cut my left thumb nail up to make it look torn. I keep my right thumb nail super short because otherwise I scratch my eyeball when I take my contacts out, so inspired by YouTuber Klairdelys, I used a fake nail to give the appearance of a truly torn up nail.
The rest of my fingers are a bit less gory, though I did decide to pool the red polish at my cuticles rather than keep them clean. And I kind of messed up when placing some of my vinyls (which are from Nails Redesigned), so the drips ended upside down on half of my nails. Oh well! It was an intentional design element. Yeah.
I actually used a different black polish than usual this time! I recently won a polish giveaway from Nail It! magazine and received 8 different Salon Perfect shades for Halloween. Their black polish is called Oil Slick, and that's the one I used for this design. The white is Salon Perfect Sugar Cube. My blood red colors are Nails Inc, London Kensington High Street (the darker red pooled at my cuticles) and Sally Hansen CSM Red My Lips (the brighter red all over my thumbs).
What do you think about this rather gory nail art? I hope it didn't gross you out too much! Tell me what you think of this one!
There are only two designs left in this challenge - which is exciting because that means Halloween is fast approaching, but it's also sad because that means October is almost over. How will you be doing your nails on the 31st? Let me know in the comments!
I'll throw the challenge image up top this time, to buffer the gore and make it easier to avoid seeing:
I TORE UP MY THUMB NAILS CLAWING MY WAY OUT OF MY OWN GRAVE.
Just kidding.
Actually, I did decide at the last minute to cut my left thumb nail up to make it look torn. I keep my right thumb nail super short because otherwise I scratch my eyeball when I take my contacts out, so inspired by YouTuber Klairdelys, I used a fake nail to give the appearance of a truly torn up nail.
The rest of my fingers are a bit less gory, though I did decide to pool the red polish at my cuticles rather than keep them clean. And I kind of messed up when placing some of my vinyls (which are from Nails Redesigned), so the drips ended upside down on half of my nails. Oh well! It was an intentional design element. Yeah.
The blood with the white background ended up upside down because of how I placed the vinyls.
I usually hate using flash for nail photos, but it helped let the red-on-black nails show up a bit better.
What do you think about this rather gory nail art? I hope it didn't gross you out too much! Tell me what you think of this one!
There are only two designs left in this challenge - which is exciting because that means Halloween is fast approaching, but it's also sad because that means October is almost over. How will you be doing your nails on the 31st? Let me know in the comments!
October 23, 2015
Do I Need Them All? Zoya Ryan vs Essie Style Cartel
Welcome to this month's edition of Do I Need Them All! Today we'll be looking at two lovely navy blue cremes: Zoya Ryan and Essie Style Cartel. They're both from each company's Fall 2014 collections, but navy is always a good color for this time of year! I actually bought Ryan shortly before breaking a no-buy policy to snatch up Style Cartel, and then I facepalmed at myself when I held them up next to each other. Let's see how they actually compare!
Style Cartel is a little bit lighter and more blue-toned than Ryan. Ryan is such a deep shade of navy that it almost looks black in lots of lighting.
Overall, I like Ryan more than Style Cartel. Ryan's formula is dense and highly pigmented. It can almost be a one-coater, as long as you have a steady hand. I did use two coats in these photos, mainly to help neaten the line around my cuticles. Style Cartel, however, is much thinner, almost the the point that it's watery. I left it at two coats on my middle finger, and did three coats on my pinkie. You can see that the third coat deepened the shade just a little bit, but it still looks lighter and bluer than Ryan.
So, Do I Need Them All? Ehhhh, I would say no. They are slightly different, so I wouldn't call them dupes, but they're so close that I don't think owning both is a must. My personal recommendation is Ryan, simply because the formula is so much smoother and more opaque, but Style Cartel is also a good navy blue polish.
Style Cartel is a little bit lighter and more blue-toned than Ryan. Ryan is such a deep shade of navy that it almost looks black in lots of lighting.
Don't mind the airbubbles on my ring finger! Or the bright blue glare, which is from my lamp and its blue shade.
Overall, I like Ryan more than Style Cartel. Ryan's formula is dense and highly pigmented. It can almost be a one-coater, as long as you have a steady hand. I did use two coats in these photos, mainly to help neaten the line around my cuticles. Style Cartel, however, is much thinner, almost the the point that it's watery. I left it at two coats on my middle finger, and did three coats on my pinkie. You can see that the third coat deepened the shade just a little bit, but it still looks lighter and bluer than Ryan.
So, Do I Need Them All? Ehhhh, I would say no. They are slightly different, so I wouldn't call them dupes, but they're so close that I don't think owning both is a must. My personal recommendation is Ryan, simply because the formula is so much smoother and more opaque, but Style Cartel is also a good navy blue polish.
October 19, 2015
October nail art challenge Day 19: Pumpkins
Oh boy, was I ever excited for this theme! Partly because of the awesome water decals that I have, and partly because I finally found a good rusty orange, my pumpkin mani is totally en pointe.
OPI It's a Piazza Cake is my favorite orange nail polish ever. It's such a realistic pumpkin orange! For the white backgrounds, I turned to my favorite white, Salon Perfect Sugar Cube. And the green stem and vines on my middle finger is Finger Paints Monet Money.
I originally wanted to use the pumpkin string decals as a French tip border, and I considered either doing orange nails with white tips or vice-versa, but I decided against that when I tested it out on a piece of paper. A dual-layer string of pumpkins still looked great to me!
The only thing I wish I could have done differently about this design is to make it glow in the dark. Just imagine how great it would be if the jack-o-lantern faces could glow out at you, just like a real jack-o-lantern! But the only glow in the dark polish I have is Dr. Franken-sparkle, which you saw in my ghosts mani, and that wouldn't really work for a pumpkin face. Maybe I need to find a clear glow in the dark top coat...
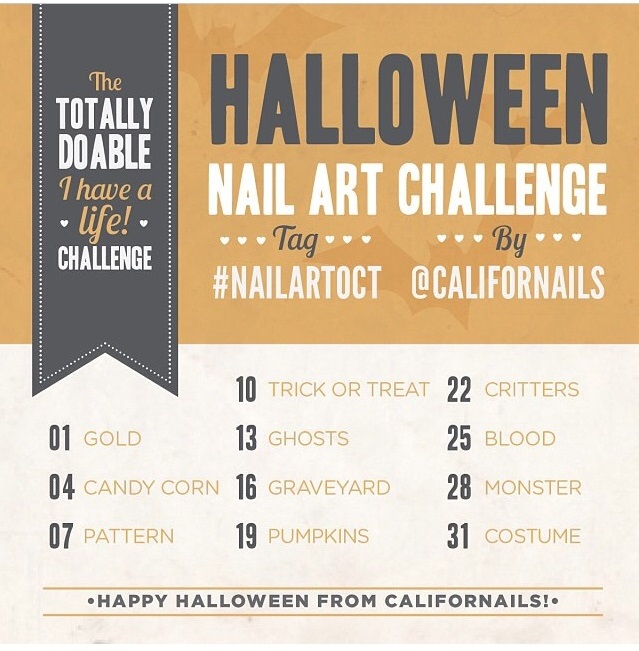
Anyway, here's the challenge image as always! Which design are you most excited for? I still need to research how to do my nails as a historically accurate flapper...
OPI It's a Piazza Cake is my favorite orange nail polish ever. It's such a realistic pumpkin orange! For the white backgrounds, I turned to my favorite white, Salon Perfect Sugar Cube. And the green stem and vines on my middle finger is Finger Paints Monet Money.
I originally wanted to use the pumpkin string decals as a French tip border, and I considered either doing orange nails with white tips or vice-versa, but I decided against that when I tested it out on a piece of paper. A dual-layer string of pumpkins still looked great to me!
The only thing I wish I could have done differently about this design is to make it glow in the dark. Just imagine how great it would be if the jack-o-lantern faces could glow out at you, just like a real jack-o-lantern! But the only glow in the dark polish I have is Dr. Franken-sparkle, which you saw in my ghosts mani, and that wouldn't really work for a pumpkin face. Maybe I need to find a clear glow in the dark top coat...
Anyway, here's the challenge image as always! Which design are you most excited for? I still need to research how to do my nails as a historically accurate flapper...
Labels:
Challenges,
Decals,
Finger Paints,
Green,
Halloween,
Nail art,
nailartoct,
OPI,
Orange,
Salon Perfect,
White
October 16, 2015
October nail art challenge Day 16: Graveyard
Today's theme was another decal-heavy design, thanks to the awesome decals I got from Naildrobe! I don't know what I would have done with this design if I didn't have the decals. It definitely would have taken several hours!
As I've done before, the background is Salon Perfect Sugar Cube topped with Sally Hansen Big Smoky Topcoat. Somehow I love that look so much more than a gray polish - I think it looks so much creepier! I topped everything off with a matte topcoat to give it a slightly spookier, more natural look.
I decided to add some grass to some of my nails, for a little bit more depth. I did that by painting on Finger Paints Monet Money using the dry brush technique. (I applied my coat of Big Smoky after doing the green on these nails, to make the grass a bit darker.) Sadly, the green made the gravestones pretty hard to see, but overall I really love this design!
As always, here's the challenge image! I'm very much looking forward to pumpkins in a few days. And I really, really need to research how to do my nails for my costume! I'm going as a historically accurate flapper, and nail polish as an industry and a technology wasn't very advanced back then. Which of the remaining themes are you most excited for? Have you been participating in this challenge? Let me know in the comments!
Apparently I have a small cut on my middle finger. I can't even see it in person! I wonder how that got there.
As I've done before, the background is Salon Perfect Sugar Cube topped with Sally Hansen Big Smoky Topcoat. Somehow I love that look so much more than a gray polish - I think it looks so much creepier! I topped everything off with a matte topcoat to give it a slightly spookier, more natural look.
That ding in the polish came from trying to pinch an air bubble out from under the decal when I laid it down.
I decided to add some grass to some of my nails, for a little bit more depth. I did that by painting on Finger Paints Monet Money using the dry brush technique. (I applied my coat of Big Smoky after doing the green on these nails, to make the grass a bit darker.) Sadly, the green made the gravestones pretty hard to see, but overall I really love this design!
As always, here's the challenge image! I'm very much looking forward to pumpkins in a few days. And I really, really need to research how to do my nails for my costume! I'm going as a historically accurate flapper, and nail polish as an industry and a technology wasn't very advanced back then. Which of the remaining themes are you most excited for? Have you been participating in this challenge? Let me know in the comments!
October 13, 2015
October nail art challenge Day 13: Ghosts
Last year's Halloween challenge also had a day of ghosts, and to be totally honest I didn't do much different this year. But that's okay because ghosts!
I did use some new polishes this year, thanks to the Monster Mash-themed Mani of the Month box that I got last month. Heather's Hues Witches & Werewolves & Ghosts, Oh My! is the embodiment of Halloween: a black background with purple, green, and orange glitters. And Proper Polish Dr. Franken-sparkle is another awesome Halloween glitter polish with its assortment of different shaped glitters.
You might recognize the third ghostly background as Twisted Colors P.S. I Enjoy Acid Pops. I used that one as a background on my entire left hand last year. It's the perfect toxic-green for Halloween! I guess its green pigmentation is extra strong, because the green shows through and turned my ghosts on those nails greenish themselves.
I did spice things up a little bit this year by using some water decals from Naildrobe. I love all of the Halloween decals I got this year! Don't worry, you'll definitely be seeing the rest of the designs throughout the rest of this challenge. ;)
The white and black that I used for the hand-painted ghosts are Salon Perfect Sugar Cube and Nina Ultra Pro Black, respectively. This design was pretty simple but a lot of fun - especially since I got to use such awesome background colors for my ghosties!
As always, here's the giveaway image. The month may be almost half over, but it's never too late to join in the fun! Have you been participating in this challenge? Let me know in the comments!
HOLD THE PHONE. Dr. Frankensparkle GLOWS IN THE DARK. Whaaaat!
I noticed this when I went to bed last night, and there was an odd glowing coming from some of my nails. You can even almost make out the outline of the ghosts on two of my nails, since the ghost decals are on a clear background! So cool!!!
I did use some new polishes this year, thanks to the Monster Mash-themed Mani of the Month box that I got last month. Heather's Hues Witches & Werewolves & Ghosts, Oh My! is the embodiment of Halloween: a black background with purple, green, and orange glitters. And Proper Polish Dr. Franken-sparkle is another awesome Halloween glitter polish with its assortment of different shaped glitters.
You might recognize the third ghostly background as Twisted Colors P.S. I Enjoy Acid Pops. I used that one as a background on my entire left hand last year. It's the perfect toxic-green for Halloween! I guess its green pigmentation is extra strong, because the green shows through and turned my ghosts on those nails greenish themselves.
I did spice things up a little bit this year by using some water decals from Naildrobe. I love all of the Halloween decals I got this year! Don't worry, you'll definitely be seeing the rest of the designs throughout the rest of this challenge. ;)
The white and black that I used for the hand-painted ghosts are Salon Perfect Sugar Cube and Nina Ultra Pro Black, respectively. This design was pretty simple but a lot of fun - especially since I got to use such awesome background colors for my ghosties!
As always, here's the giveaway image. The month may be almost half over, but it's never too late to join in the fun! Have you been participating in this challenge? Let me know in the comments!
Update 10/14!
HOLD THE PHONE. Dr. Frankensparkle GLOWS IN THE DARK. Whaaaat!
I noticed this when I went to bed last night, and there was an odd glowing coming from some of my nails. You can even almost make out the outline of the ghosts on two of my nails, since the ghost decals are on a clear background! So cool!!!
(The ghost nails in question are the two at the bottom left.)
I even woke up in the middle of the night for whatever reason and found my nails still glowing. How is that even possible?! Thanks, Proper Polish, for giving me a super fun surprise! :D
Subscribe to:
Posts (Atom)