Showing posts with label Jamberry. Show all posts

June 10, 2016

The Sad Tale of the Broken Nail

Three weeks ago, I got some clothes in the mail.  It was a big surprise because the tracking info had only been updated as far as "shipped," with my expected delivery date about a week later than when it actually came!  And these clothes were a warm welcome after a long week of cleaning in preparation for company.

I tried on my new top with one of my older skirts to see how they'd look together.  While attempting to tuck the shirt in, I jammed my left pinky against the shirt and my nail bent backwards so badly that the nail cracked halfway across, a few millimeters below the hyponychium.  Yowch!


Luckily, I'd been wearing a peel-off base coat so I didn't have to put acetone on the fresh wound.  Also luckily, I was done with my chores for the day and had planned on redoing my nails after trying on my clothes, so I had plenty of time to patch up the break!  I used a small piece of tea bag and a few layers of nail glue to hold the two pieces of nail together...


... then I painted my nails as I usually would.  Two layers of base coat, a layer of white, two layers of sponged-on polish for the gradient, and two layers of top coat.  (for better photos of this manicure, see yesterday's post!)


I figured that the tea bag, combined with the many layers of glue and polish, would be enough to last at least until the break grew above the hyponichium.  Nope.  The layers of stuff holding my nail together split while I was digging my clothes out of the dryer the very next night.  I shouldn't have used my left hand for that :(  It was too late at night for me to want to deal with new wet layers, so I put a Band-Aid over my finger to hold everything together while I slept.


By the next afternoon, the polish on the top half of my nail had chipped off, revealing the break in the nail.  The once-neat white line of my hyponichium was now jagged and awkward.


I removed the polish - which luckily didn't hurt, because the wound of my torn skin had healed by then - and decided to use a Jamberry nail wrap to hold it together.  A nail wrap can't split the way polish can, after all, so it should be a good hold!  And Tropical Mirage matched my neon gradient pretty well.


Well, that would have worked, except that I made the mistake of putting some nail glue on my nail before applying the wrap.  Apparently, that prevented my wrap from being able to form a perfect seal on my nail, and after a few days, it started peeling up around the edges.


By the next weekend, which was Memorial Day weekend, the wrap was almost completely lifted off of my nail - except, to its credit, for the part that was directly over the original break in my nail.


I was on vacation with my family in Gatlinburg, Tennessee, that weekend, and I didn't have a bunch of tools with me.  I'd had the foresight to at least pack my nail clippers, file, an orangewood stick, and my base and top coat just in case.  Luckily, I had enough time after breakfast on Saturday to tend to my nail while everyone fought for shower time.  (One of my favorite parts of being a night showerer!)  I pried the wrap off to discover my nail had broken on the other corner, too.  It was hanging on by a thread of skin in the middle, not unlike a loose tooth hanging on by one little root that lets you spin it around in your mouth.

The one bright side was that the newer break had the courtesy to be above my hyponichium, so at least that wasn't a fresh wound or a break that would further ruin the shape of my white line!

So, without the tools or time to try to save the nail again, I chopped it off.
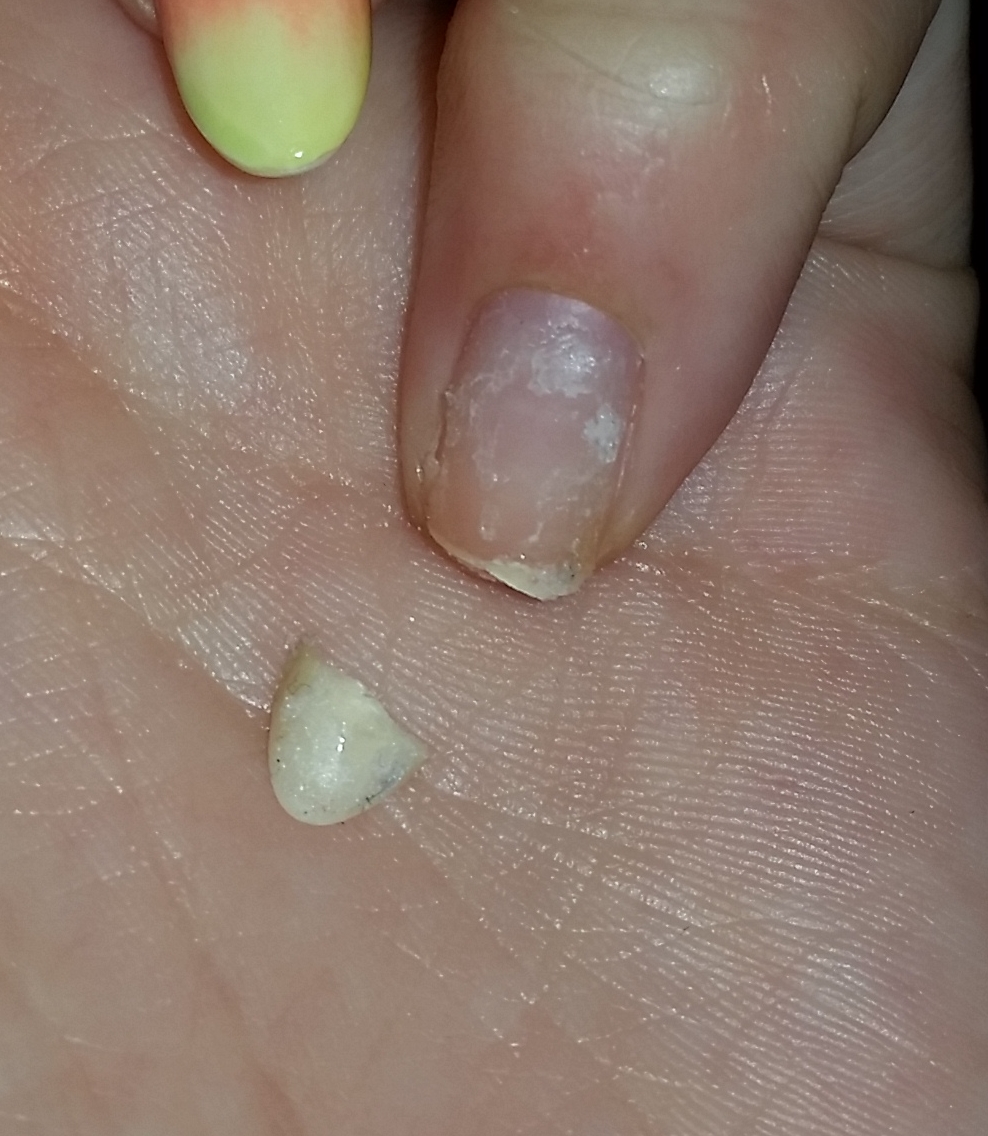

The weirdness on the surface of my nail is just the nail glue that got partially torn up by the Jamberry wrap.  And the small amount of free edge was pretty rough, so I filed it down nice and flat.


And that, my friends, is the end of this sad story.  Every time I looked at my finger for a few days, I felt like someone had chopped it off at the tip!  I don't even know how long it's been since I had absolutely no free edge on my nails.

Until the nail grows out long enough for me to shape it to match the rest of my nails, I'm going to keep it out of photos.  I think it looks really silly in my usual pose, all short and stubby!  Although it's been three weeks since the initial break, I still don't have enough growth to get my pointed round shape.  And I absolutely refuse to cut down the rest of my nails to even closely match this one!

February 17, 2016

Cloud Mani for Valentine's Day!

Hey guys!  Valentine's Day may be over, but I wanted to share my look for the romantic weekend with all of you. 

Looking through my Jamberry collection, I found the very pink wraps that I won last year in Jamberry's Mother's Day giveaway.  They're much more pink and frilly than I like for my everyday style, but they're totally perfect for Valentine's Day, so I decided to use two of them!


Thus far, every time I've donned Jamberries I've had to remove them within a day.  Despite my best efforts I always end up with ripples at my nail tips AND at my cuticles.  Ugh.  But then one of my friends showed me the baseball method!  Cutting a tiny notch out of the side (or two sides, if your nails are suuuuper curved) allows the wrap to actually lay flat on my nail.  It only took about an extra 30 seconds per wrap and it allowed me to don the wraps for a few days until I was ready to redo my nails!


This was also the first time I tried out the cloud mani.  It was super easy - although deciding what order I should arrange the colors in took a while thanks to my indecisiveness. ;)  The darker purple at my cuticles is Zoya Demi, the lightest shade in the middle is Zoya Rue, and the medium rosy pink at my nail tips is Zoya Kate.  (Yay Kate!)

I didn't think to make a tutorial for this, so here's a link to the one that I followed to achieve this look.  Some day, I will remember that I bought a tripod for my phone so I can take videos of my nail art!

Derek and I went out to dinner on Saturday night to our favorite Mexican place, and we spent Sunday watching Netflix and playing games.  (I may or may not have played Sims 3 for a couple of hours.)  What did you do for Valentine's Day?  More importantly, what did you put on your nails for the holiday?  Let me know in the comments!

November 18, 2015

Happy Movember!

November has been lovingly known as Movember for a few years now, thanks to the "No-Shave November" trend.  (Is it a trend? a lifestyle? a challenge? I honestly don't know at this point.)  So I decided to do a quick and easy Jamberry manicure to celebrate!


I mixed things up because I have a TON of sample sheets of different wraps - my Jamberry representative loves sending out samples to her customers!  So I had a lot of fun with the accent nails.


Sadly, most of the wraps in this mani have been discontinued - Almond Ombre, which is on my left pinky finger, the mustache French tips, which are adorably called Uno Momo, and the plaid on my right pinky have all been discontinued.  The flowery wrap on my left middle finger is called Flapper and it's still around in Jamberry's shop, woohoo!  The animal print on my left pinky is Hear Me Roar.


A lot of people around the internet dislike Jamberry, for a variety of reasons.  The biggest one is that they're a lot harder to apply than the company makes it look - and that's definitely true.  I still need some practice - you can see the wrinkles on some of my nails.  But my favorite thing about Jamberry is that once I've finished applying them, I'm done.  This manicure may have taken me 45 minutes, but when I was done, I was able to whip up dinner immediately without having to worry about smudging, chipping, or denting my nails.  And honestly, 45 minutes for this many nail art designs is nothing!  (At least the way I paint my nails, ha.)  For a solid color nail, I definitely prefer polish, but I really like using Jamberry for nail art.

Have you ever tried Jamberry, or any other of the different kinds of nail wraps out there?  What did you think of them?  Let me know in the comments!

August 27, 2015

What did I do on vacation?

I spent the last two weeks of July in Michigan with my family and friends.  It was an amazingly fun time!  But, of course, I can't go two weeks without redoing my nails.  And, since my loved ones universally recognize me as The Nail Girl of the Family, I got several requests to do peoples' nails.  Let's have a look at what I spent my vacation downtime doing!

My first few days in Michigan were spent at my oldest sister's house.  Unfortunately, she couldn't take much time off of work.  But it was kind of okay, because I got to spend one entire day with my two year old nephew, and I had another whole day to myself - in which I spent most of the day painting my nails.  I wanted to match my new bathing suit and my new dress, a feat that would admittedly have been easier in high school when 80% of my wardrobe was the same shade of blue.  But I accepted the challenge with my intermediate nail art skills!

 
the clothes in question.

I used Jamberry Arcade on my thumb and pinky - a wrap that I bought specifically to match my dress.  Zoya Ryan was another easy choice for my middle and ring fingers to match both the dress and my bathing suit.  And to help match my bathing suit, I threw in one nail of CDB Lacquer Passionate.   

(side note: I used a blow dryer to heat up my Jamberry wraps this time, and 
they went on SO smoothly!  never using my space heater for wraps again!!!)

I painted my toes to match my bathing suit a bit more exclusively, but I was silly and didn't take a picture of it!  I used the dry brush technique and ORLY Saturated, Zoya Oceane, Sephora Papaya Daiquiri, and Passionate and Ryan again.  I'm so bummed that I didn't take a good picture of it!  Maybe I'll just have to recreate the pedi soon.  I am, after all, going on an end of summer vacation to Ocean City, Maryland this weekend, where I will be wearing my bathing suit a lot!

The same night that I did my nails, I painted my sister's nails.  Purple is her favorite color, so I definitely wanted to use Saturated on her.  Still on a dry brush kick, I did two accent nails using Zoya Tallulah and Sinful Colors Bikini.  The white background is Salon Perfect Sugar Cube.  


She loved her nails so much!  Steph has never much bothered with makeup or nail polish, and now that she's a mom she bothers even less.  I painted her nails in her basement hunched over an end table, but we might as well have been at a high-class spa for how excited she was about her manicure!  Then, when she woke up her son in the morning and was trying to put his clothes on, he grabbed at her nails and said, "what's that?!"  <3


At a girls' night with my best friends from high school, my friend Melanie wanted a simple grey manicure.  I used China Glaze Intelligence, Integrity, and Courage on most of her nails with an accent of CDB Lacquer He Sees All.


I painted a few other peoples' nails, but I was having too much fun with them to really think about taking pictures for the blog.  All of the other manis that I did were simple colors with an accent color, though, so you're not missing out on any super-special nail art!

What's your favorite look from this post?  Have you ever painted your nails to match a vacation or trip?  Let me know in the comments!

April 5, 2015

Easter Nails - then and now!

Hoppy Easter, every bunny! :D

I have some quick nail art for you tonight!  I've been a bit lazy with painting my nails lately - long story short, I'm apartment hunting and learning to crochet, so my nails are taking the back seat right now.  I'm still trying really hard to post something once a week, though!

Anyway, since I didn't spend a whole afternoon painting special Easter egg nails like I did last year, I did something a bit more quick this year.  I've had this half sheet of Jamberry nail wraps sitting around for ages, and every time I look at them I just think "These look too Easter-y for today."  So bam! I finally used them in an Easter mani! 


I have TONS of awesome springy polishes from my Bunny Box, and it took a while to narrow it down to only three to match the wraps!  I finally settled on He Doesn't Carrot All by Digital Nails (the pink), Purple Peep-le Eaters by Firecracker Lacquer (the purple), and Eggstra Special by Smokey Mountain Lacquers (the blue).  (All of these polishes were made specially for the Bunny Box collaboration, so I don't have a link to each polish for you!  The Jamberry wraps are also no longer available in the shop.)
 
I definitely put a lot more effort into my Easter nails last year - take a look!


My nails are actually pretty close to the length that they were one year ago!  I had two nails break REALLY badly a few weeks ago, so I chopped them all off, and decided that I liked them a bit shorter.  I'm not so sure now, I think I want to keep them longer again!

Did any of you do a special Easter mani this year?  What are your favorite Easter traditions?  Let me know in the comments!

PS - if you have a few minutes, I would really appreciate it if you took my survey!  I want to know what you think of the blog, how you interact with it on social media, and some other various details.  It should only take about 5-8 minutes!

March 25, 2015

Jamberry: Everything Nice

I've created enough wibbly nail art in my time to know that everything takes practice, and that nothing is ever as easy the first time you try it as the tutorial makes it look.  And that, I realized, also applies to applying nail wraps.

The first time I posted about Jamberry nail wraps was over the summer, and a string of recent online parties for Jamberry has re-ignited my interest in their products.  If you remember, the first time I applied Jams things were a bit wrinkly, and I ended up taking the wraps off within two days (the wraps are supposed to be able to last up to 14 days).  The second time I applied them was months later, and I didn't have much more success.  Another problem I had that time was that I used wraps that were too big on a few nails.  So lesson learned, Jams are the opposite of shoes: always size down rather than up!

Those wraps didn't stay on my nails very long either, and my application was so wrinkled and messy that I didn't even bother taking pictures.  But the good news is that each package of Jamberry comes with two wraps of each size, so I can still get a good long-lasting mani with that pattern!  (It was Crash Art, and it is awesome.)

Determined to get a long-lasting, pretty Jamberry mani, I watched a couple of videos with tips on how to apply them and tried again.  YouTube user BeautyandJams has lots of really great tutorial videos with some really neat tips and tricks for both applying and removing Jams.  So when I applied these wraps, called Everything Nice, I was very happy with my application results!  I still had a little bit of wrinkling, but this time it was only on my pointer fingers, rather than all of them.  I have long felt that my pointer finger nails bend kinda funny at the sides, and the fact that I only got wrinkles on those fingers solidifies that belief!


It's worth nothing, I think, that the patterns look far less pixelated in person than they do in the large photos.  Since they're printed from a computer, the designs are made up of pixels, and since you're seeing an image created by pixels, well, the pixels stand out a lot.  (Say "pixels" more, please.)  But in person, the designs look very smooth and pixel-free.


As great as these applied this time, I still took them off after just a few days.  It's hard to keep my nails the same for more than 4-5 days when I have a blog to run, after all!

Holding-the-product shots are super awkward when the product is a long, flat rectangle. :)

I'm currently hosting an online Jamberry party, so if you're interested in buying any wraps right now, please shop through this link and select my party - "Kate Jamz Into Spring" (or maybe it just has my name, Kate Wagner) - when you check out!  Jamberry has just released their new spring catalog and there are some great new wraps in there - and they have an amazing Mother's Day bundle available right now!

Have you ever tried Jamberry wraps, or any other kind of nail wrap?  How did you like them?  Let me know in the comments!

September 5, 2014

Something different: Jamberry Nail Wraps

There may be only a few posts on this blog, but it's already time for something a little different!  There's no nail polish in this blog post whatsoever.

A few months ago, my cousin held an online party for Jamberry Nail Wraps.  I'd never heard of them, but I pretty much jumped on the wagon immediately because, like any girlie party (Tupperware, Pure Romance, and the like), there were free prizes for participating in the Facebook group - and we all know how much I love free things!

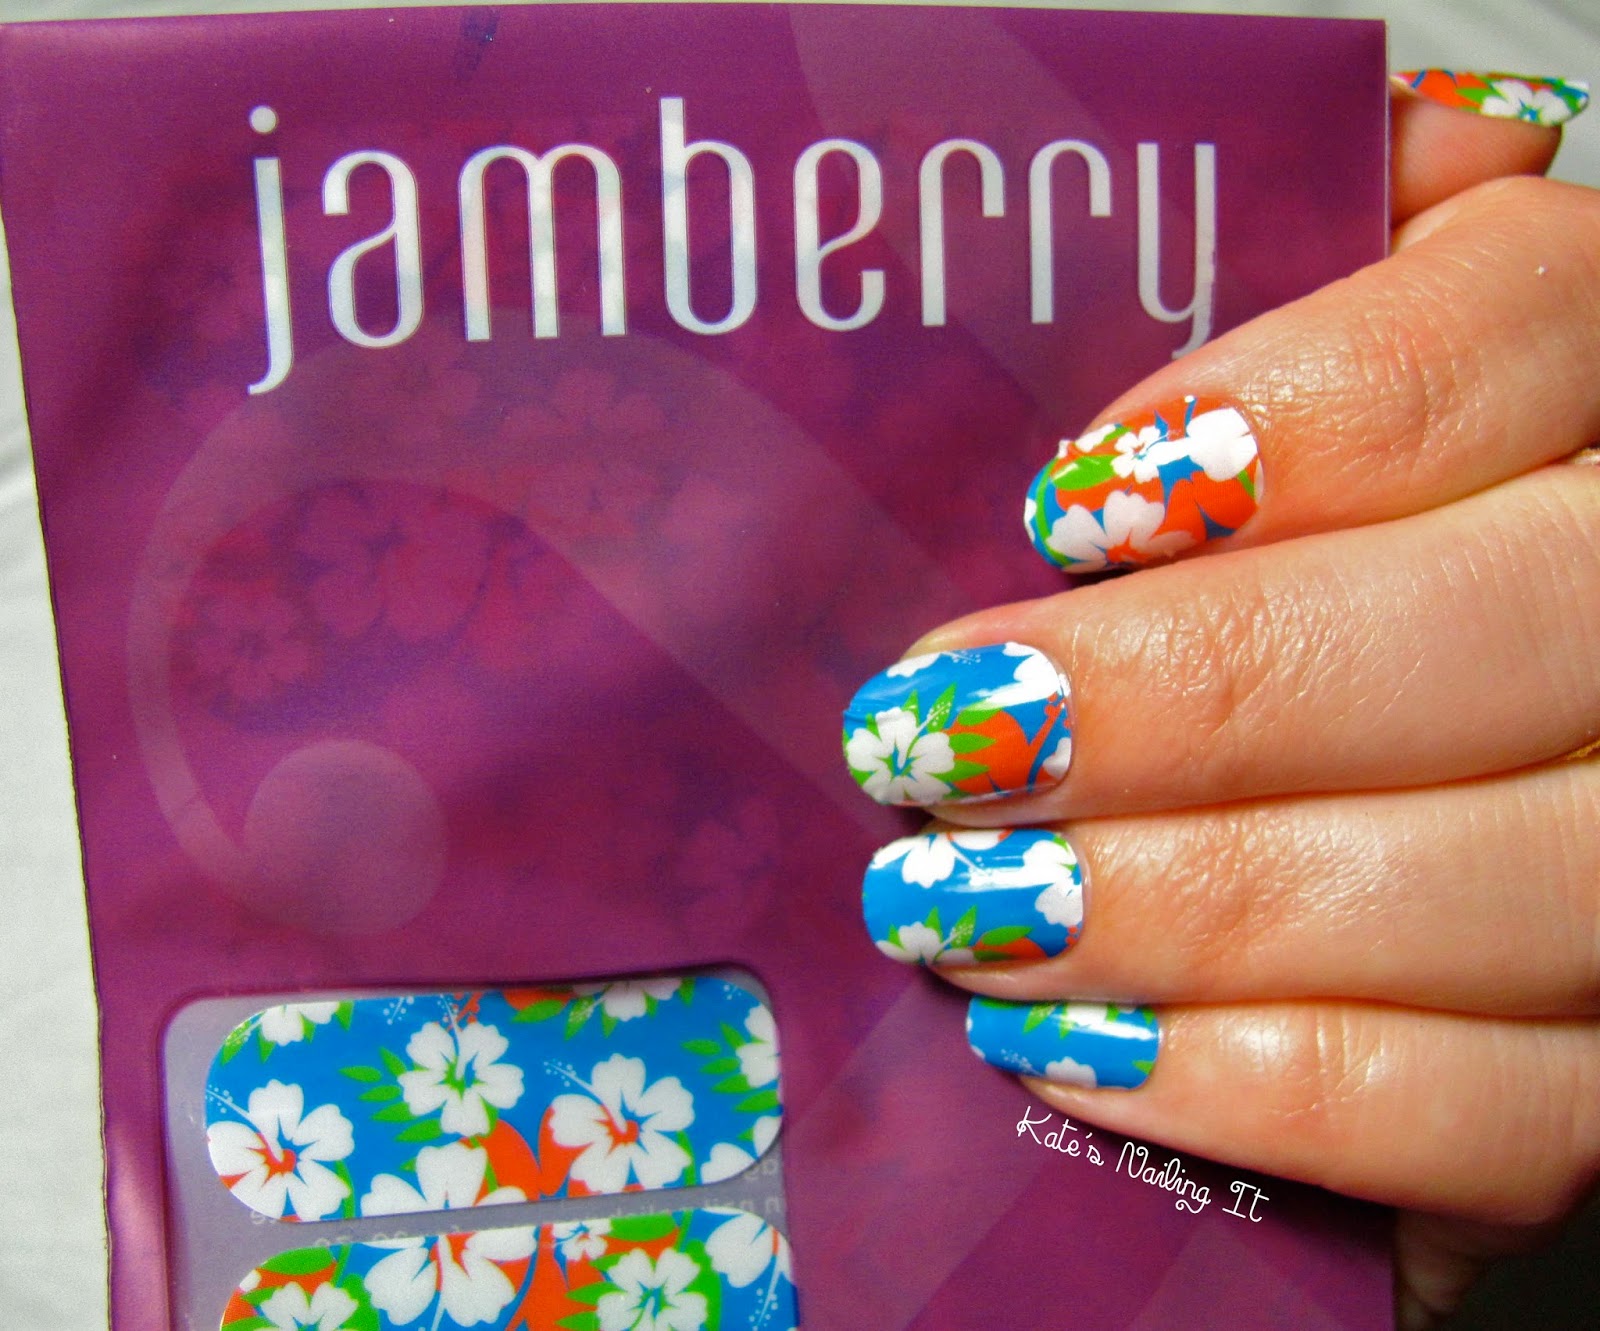
Anyway, I ended up choosing only one design to buy: "Aloha Flower" (unfortunately, this style isn't in the shop anymore, so I can't give you a link for it).  A huge reason I picked that one is because it totally matches my awesome tank top that I got early this summer!  And, while I haven't posted any clothes-matching manis on the blog yet, I LOVE it when my nails match my clothes.  (Check it: here and here.)

Phone quality, because I forgot to take a picture with the tank top when I had my camera and lamp set up.

I finally decided to try out the wraps today, and I'm pretty impressed!  The instructions mentioned "if applying over lacquer," which I took to mean that it's safe to apply on top of polish.  (They sell a few patterns with a clear background.)  I threw on my usual two coats of Sally Hansen Hard as Nails, to help my nails stay stronger with extra layers of stuff on them.


Application of the wraps is a little bit tricky, but it's a pretty simple concept.  You pick the wrap that best fits your nail and grab it with either tweezers or an orangewood stick, then heat it up.  The website and instructions tell you to use a special mini heater (which of course Jamberry sells), or else use a blow dryer.  I don't own a blow dryer, so I used my bedroom space heater, and it worked just fine!  Hold the wrap in front of the heat for a few seconds until it warms up, then stick it on your nail.  Cut off the excess, then file off any bits of wrap extending above the edge of your nail.

 I'm holding Zoya "Wendy" in this one, if you're curious.

I found that it was easier to avoid wrinkles on the edge of the wrap if I cut it fairly close to the length of my nail before putting it on.  For the first three nails, I left the wraps at their full length - one and a half inches - and I ended up with LOTS of wrinkles at the very tip of my nails.  (Most of my nails are close to half an inch long.  That's a LOT of excess wrap!)  By my ring finger, I realized that if I cut the wrap much shorter first, it was less likely to wrinkle at the tip.

Pretty severe wrinkling here.

I wanted to paint one nail on each hand on my own - I happen to have the perfect blue to match the background of this pattern, and a pretty good green and orange and of course a white - but I chickened out.  For one thing, it was getting too close to dinner time, and for another, I didn't want to have eight computer-perfect designed nails and then two nails that look just a little too wibbly.  But each Jamberry set comes with two stickers of every size, so I'll be able to do this again, and maybe then I'll try my hand at painting to match!

Here, I'm holding Zoya "Mitzi."

(I think it's worth noting that the pattern doesn't look as dot-y as it does in the super closeup pictures that I took.  To the naked eye, this is a perfectly smooth pattern.)

Obligatory "holding the product" shot, even though it's fairly awkward to hold the floppy envelope for a picture.
Also, will my pinky nail ever NOT be partially hidden underneath my ring finger?

Jamberry says that these wraps can last up to 14 days.  I definitely won't be wearing them for that long, because I'll need to change my nails in order to write another blog post!  I'll update this post to talk about how they fare after the weekend, and I'll also mention how well they come off.

Update 9/7/14

I  took the wraps off late Saturday night.  Predictably, the wraps that had wrinkled on the edges started to peel off a little bit.  The peeling wasn't so bad that the wraps risked falling off, but it did make my nails sort of painful, like they had teeny tiny swords on the edges of them.  On the few nails with perfect application, I had no peeling on the edges of my nails and would have been happy to keep them on until I was ready to change my nails!

Let me just say this before I describe the process:  DO NOT, UNDER ANY CIRCUMSTANCES, WEAR THESE ON TOP OF ANY KIND OF NAIL POLISH, LACQUER, OR NAIL STRENGTHENER/HARDENER.

The website and packaging give you three different ways to remove the wraps: re-heat them in front of your heat source and peel them off; soak your nails in acetone for a few seconds and peel them off; or soak your nails in warm water for a few seconds and peel them off.  NONE of these methods work properly if the wraps were applied over lacquer.  It seems that the glue on the wraps bonded to the strengthener on my nails, making it very difficult to take the wraps off.  Everything was a sticky mess.  What ended up working was: I dipped an orangewood stick in acetone and worked it underneath the wraps, then pulled them off and cleaned the goo off my nails with more acetone.  Since I had the nail strengthener on all of my nails, I can't say for certain whether the wraps would leave a gooey mess on bare nails; I certainly hope not!

All in all, I was quite happy with these wraps and I definitely recommend trying them out!