March 25, 2015

Jamberry: Everything Nice

I've created enough wibbly nail art in my time to know that everything takes practice, and that nothing is ever as easy the first time you try it as the tutorial makes it look.  And that, I realized, also applies to applying nail wraps.

The first time I posted about Jamberry nail wraps was over the summer, and a string of recent online parties for Jamberry has re-ignited my interest in their products.  If you remember, the first time I applied Jams things were a bit wrinkly, and I ended up taking the wraps off within two days (the wraps are supposed to be able to last up to 14 days).  The second time I applied them was months later, and I didn't have much more success.  Another problem I had that time was that I used wraps that were too big on a few nails.  So lesson learned, Jams are the opposite of shoes: always size down rather than up!

Those wraps didn't stay on my nails very long either, and my application was so wrinkled and messy that I didn't even bother taking pictures.  But the good news is that each package of Jamberry comes with two wraps of each size, so I can still get a good long-lasting mani with that pattern!  (It was Crash Art, and it is awesome.)

Determined to get a long-lasting, pretty Jamberry mani, I watched a couple of videos with tips on how to apply them and tried again.  YouTube user BeautyandJams has lots of really great tutorial videos with some really neat tips and tricks for both applying and removing Jams.  So when I applied these wraps, called Everything Nice, I was very happy with my application results!  I still had a little bit of wrinkling, but this time it was only on my pointer fingers, rather than all of them.  I have long felt that my pointer finger nails bend kinda funny at the sides, and the fact that I only got wrinkles on those fingers solidifies that belief!


It's worth nothing, I think, that the patterns look far less pixelated in person than they do in the large photos.  Since they're printed from a computer, the designs are made up of pixels, and since you're seeing an image created by pixels, well, the pixels stand out a lot.  (Say "pixels" more, please.)  But in person, the designs look very smooth and pixel-free.


As great as these applied this time, I still took them off after just a few days.  It's hard to keep my nails the same for more than 4-5 days when I have a blog to run, after all!

Holding-the-product shots are super awkward when the product is a long, flat rectangle. :)

I'm currently hosting an online Jamberry party, so if you're interested in buying any wraps right now, please shop through this link and select my party - "Kate Jamz Into Spring" (or maybe it just has my name, Kate Wagner) - when you check out!  Jamberry has just released their new spring catalog and there are some great new wraps in there - and they have an amazing Mother's Day bundle available right now!

Have you ever tried Jamberry wraps, or any other kind of nail wrap?  How did you like them?  Let me know in the comments!

March 14, 2015

Pi Day 2015: The Date of the Century!

Starting in 2003, every year has had a cool consecutive date when written out numerically in the American fashion.  1/2/03, 3/4/05, all the way on up to 12/13/14 - which, sadly, is the last one that I'll see.

But this year?  This year holds the very best date that anyone alive will ever see.  Today is March 14, 2015: 3/14/15.  The best Pi Day ever.  Watch your clocks for 9:26:53 pm, for that shall be the best second you will ever see!

Yeah, in case you haven't figured it out yet, I'm a little bit of a geek.  I like math and numbers and stuff. :)

Anyway, because this year's Pi Day is so epic, I painted my nails to celebrate!  They didn't turn out quite as epic as I'd hoped, but I like them all the same.


I used China Glaze Sunset Sail as the background color, which is the closest I have to pie-crust-tan, and the numbers were done with China Glaze I Brake For Colour.  The letter Pi on my right thumb was done with Sally Hansen Red My Lips and I'm super proud of how neatly it turned out (except for the top coat smears).


I don't even want to show you the rest of my right hand.  I tried some stamping, with a little pie and also some circles, but apparently stamping is really hard and everything turned out wibbly and piece-y and horrible.  I may have thrown a mini tantrum and sworn off stamping forever...

I'm going to be spending the afternoon making apple-cranberry pie, and for dinner I'm making Shepherd's Pie. :D

What are you doing to celebrate Pi Day today?  Do you think I'm a total dork for even caring? ;) Let me know in the comments!

March 10, 2015

Jior Couture: Part of the Merry Movie Collection (retiring soon!)

I'm super excited about this post, because for the first time since I started blogging, I received these polishes at a highly discounted price in exchange for swatches and a review!  So, to start off, let me promise you that I did not promise to say anything in particular; all of the words and opinions you'll read here are 100% my own and are influenced only by the polish itself, not the low price I paid for it.

These polishes are all from Jior Couture's Christmas 2014 collection, and each one is inspired by a different Christmas movie.  The colors are very versatile - they don't scream "Christmas on my nails" the way you might expect.  Which is awesome because, as much as I love a super-Christmasy polish, I like to feel like I can wear my polishes at any time of year and not feel out-of-season.

Believing Is Seeing


Believing Is Seeing is inspired by the movie "The Santa Clause," which I've actually never seen.  And even though this soft pink crelly is a Christmas polish, it really looks to me more like a spring polish!


A beautiful delicate pink crelly with several different colors and sizes of glitter, Believing Is Seeing really surprised me.  Pink is simply not my favorite polish color, and I've never seen a pink polish that made me go, "Ooh, I need that!" the way most blue polishes do.  So I wasn't really expecting to be terribly impressed by this polish, but wow, it is gorgeous!  I love the subtle, delicate shimmer in the base (which is much more visible in the flash photo).  And even though the glitters look pretty dense in the bottle, they come out pretty sparse onto the nail.  I suppose that could be a negative thing for some, but I liked the delicate effect of fewer glitters.  More "Oh, what a pretty polish, and look, it has some glitter in it!" and less "Ooh, what a dense glitterbomb!"


As far as application goes, Believing Is Seeing is really great.  It's very smooth, and the glitters don't cling to the brush or wipe off the nail.  It is very sheer, though, so if you don't want to see the line of the whites of your nail, I highly recommend using a base of white or a similar shade of pink.  Otherwise, you might need to build up to 4 or 5 coats; I stopped at 2 on my first two fingers, and went up to 3 coats on my ring and pinky fingers.  Three coats is opaque enough that from a distance you can't really see the whites of my nails, but up close and in the photos it's still sort of visible.

I recently got a macro lens for my phone's camera!  I haven't quite mastered the macro nail shot the way 
The Mercurial Magpie has, but in-the-bottle shots are pretty easy, so feast your eyes!


Son of a Nutcracker


Son of a Nutcracker is inspired by the movie Elf.  It's a really fun glitter polish in a pinkish-red jelly base.


I was actually really surprised at the opacity of this polish - two coats was pretty opaque!  I built up to three coats on my pointer and middle fingers, but left it at two on my ring and pinky fingers.


Application was pretty nice, but in order to get a nice distribution of glitter I did have to dab a little bit.  And I was slightly disappointed at how hard it was to grab those big white hex glitters - there are so many in the bottle, yet I could barely get them onto my nail.  But all the rest of the glitters went from the brush to my nails quite easily.


There's an incredibly subtle shimmer in the base of this polish - so subtle that it definitely doesn't show up in my camera even in macro mode, but if you look really closely in person, it's there!  I think subtle shimmers are one of my favorite features in nail polish.

Means A Little Bit More


Means A Little Bit More is inspired by the movie How The Grinch Stole Christmas.  (The cartoon or the live-action version?  I'm not sure, but either way this polish nails it!)  Of these three polishes, it's definitely the most Christmas-y, but I still think it would look nice in a mani any time of year!


Its green jelly base is very sheer.  If you want complete opacity, you'd probably need at least 5 coats of this one - or just use a base color.  I have three coats over naked nails here and, although my nails are tragically short after a ghastly break, you can still juuust make out a little bit of the whites of my nails at the tips.  The break that I suffered led me to cut my nails down so short that there's barely any whites left - and on my middle finger, one side broke so far down that I wasn't able to cut it into an even shape.  It was heartbreaking :(


Anyway, the polish!  I absolutely loved this one.  Application was super, super smooth - the glitters landed where I wanted them to and stayed in place, and it was nice and easy to get a good distribution of every size and color of glitter!  Pink, blue, red, silver, they're all there looking super festive and pretty.  I really like the sizes of these glitters - I think smaller glitters apply easier and look a bit better on my nails.  That's not to say that I completely dislike larger glitters - you all know that I love a good crazy glitterbomb! - but sometimes it's refreshing to use a, for lack of better word, simpler glitter polish.


So, that's it for this post.  These polishes are all available for purchase at jiorcouture.com, and they're on sale because they're going to be retiring this week!  If you're interested, hurry over to the shop!  There are three other great-looking polishes in this collection.

What are your favorite Christmas polishes?  Do you ever miss pairing traditional Christmas colors together throughout the spring and summer?  Let me know in the comments!

February 25, 2015

Creative Cuticles Nail Polish: Autumn Nights

This is another polish that I've had sitting around for quite some time, but have been procrastinating my blogging for about a month and a half.  I won a giveaway around Christmas time, and one of the prizes was one polish of my choice from Creative Cuticles Nail Polish.  I actually got the email about winning the giveaway about ten minutes after I placed my order of CCNP Christmas polishes, so I was super excited to be able to pick out a fourth color that I liked!

Autumn Nights is a beautiful shade of blue.  I've been trying to branch out from blues for a while, but I really don't own another shade like this!  Most of my blue cremes are very bright sky/electric, or deeper navy.  But I would describe this polish as a sort of denim-sky blue.  Kayla, the creator of CCNP, created this with an evening autumn sky in mind, and I think she hit the nail on the head!


It applies like a dream.  If you're careful, this can be a mythical One-Coat Wonder!  As usual with possible OCWs that I've found, the only reason I had to use two coats on most nails with this one was to clean up the line around my cuticle and to fill in spots that I missed.


This would be a really great background for many kinds of nail art!  If you like blues, cremes, and/or one-coat wonders, you definitely need this one in your collection.

February 20, 2015

Zoya's Color Lock System Review + Zuza

Some time ago, Zoya put a mini size of their Color Lock System on sale.  I don't even remember when or what the sale was exactly - though I think it might have been on Black Friday.  Anyway, it doesn't really matter exactly when and for how much I bought it, it just matters that I bought it and I'm here to review it for you!

The bottle of Remove+ that came with the mini system was actually 1 oz, but I'd used that up by the time I took this group shot.  
This 2 oz bottle was a sample sent with a large polish order. :)

For those who aren't familiar, the Color Lock consists of four parts: Remove+ nail polish remover and nail prep, Anchor base coat, Armor top coat, and Fast Drops quick-dry drops.  I decided to test out the system with one of Zoya's older colors that I recently acquired and have been dying to try, Zuza.

This post is going to be pretty wordy, so bear with me!

Remove+


Oh my gosh.  I love this stuff.  I love it so much that I spent $25 on an 8 oz bottle of it, when I usually spend about $6 on a 16 oz bottle of pure acetone.  So what's so great about this that it's worth the almost absurd price increase?  Well, the biggest thing is that it doesn't dry the crap out of my cuticles.  Since acetone evaporates so quickly, it dries out cuticle skin to the point that my nice, princess cuticles look like I just spent a week digging in rocky soil with my bare hands (minus the dirt).  A few drops of oil rehydrates them just fine and the extra step was never a big deal until I tried Remove+.  Somehow, whatever it is in the remover that hydrates my nails and cuticles doesn't prevent it from removing polish quickly and easily.  Also, it smells like lavender, which is much better than the chemical smell of pure acetone.

This is called Remove+ because it is also used to clean and prep your nails before a new manicure.  My normal process is acetone to remove old polish, oil for my cuticles, wash my hands, lotion for my hands, and then rubbing alcohol or acetone to clean off my nails.  With Remove+ I can pretty much skip straight from removing my old polish to lotion for my hands (especially since it's winter, ergo dry skin season) to Remove+ on my nails again.  Pretty neat.

Anchor


It's kind of hard to judge a new base coat AND a new top coat at the same time.  It's hard to tell whether a polish chip comes from a base coat that didn't bond well enough or from a top coat that didn't seal well enough, you know?  But I can definitely say that it applies very smoothly.  My usual base coat, ORLY Bonder, feels almost sticky while I'm applying it, even when the bottle is brand new.  This one is very smooth and thin enough to dry quickly but not so thin that it floods the cuticles.

I wrote the bulk of this post after removing the original test manicure.  In the days that passed when I didn't bother to edit in the photos, I spent a day on the town with just two coats of Anchor on my nails.  It held up fine, didn't end up feeling grimy, and didn't chip or peel or scratch.  So I'd say that this is a great base coat!

Zoya Zuza


Zuza is a beautiful mermaid's-tail aqua with a turquoise-gold shimmer.  Absolutely stunning.


Application is very smooth, as usual with Zoya.  It did feel a tiny bit on the thick side, but not so thick that it was hard to work with or avoided drying.  (It's worth noting that my polish collection lives right under a very drafty window, and it's winter - so the cold could be thickening all of my polishes a little.)  And it's very close to a one-coat wonder; I used two to be safe and to cover up spots that I'd missed on the first coat, but a more steady hand just might be able to get away with only one coat.


Since this is such a long post, I won't say as much as I normally would about this color and move on...

Armor


I'll give the same disclaimer here as I did in my matte top coats post: my life is very, very easy on my hands.  I don't have kids, I don't have a job or go to school, and I don't tinker around with any kind of mechanics.  The tasks that are hardest on my hands in my life right now are showering and cooking.

So, with that in mind, this top coat is on point.  I had on two coats of Armor for at least a week.  I didn't add any extra coats as the days wore on.  And I had minimal - and I mean minimal - edge shrinkage on day seven.  (Of course, I wrapped my tips with the color and with the top coat when I originally painted my nails.)  No visible cracks.  No chips.  No dents once it finished drying.  (More details on that in the next section.)  Zoya, I tip my hat to you on this one.  Good freakin' job.

For the record, I showered every day for seven days and cooked three times in the week that I tested this top coat.  Boom.

Fast Dry Drops


Application of the drops was fairly simple.  I angled my fingers downward and dripped one drop of the liquid onto my nail at the cuticle.  It's thin enough that one drop was enough to spread over my whole nail.

As for the success of the product... I'm not impressed.  I waited about five minutes after application and poked at my nail with an orangewood stick, and the polish was still very susceptible to puncture marks.  But what's neat is that the poke marks sort of shrunk out, like a memory foam pillow after you press on it.  I've never had that happen with a puncture mark in my polish before!


Anyway, one would think that after more than ten minutes, fast-dry drops would make polish dry as a bone, but it just didn't work for me.  Even hours after finishing this manicure, I was still able to poke a few dents into the polish - only these dents didn't shrink away.  Looks like I'll be keeping this step out of my regular manicure process.

(Side note: I'm totally bummed that I didn't avoid using the drops on a few nails per hand.  The best way to test the top coat's dry time would be to use it on its own, right?  Oh well.  I'll be sure to use the top coat again some time and throw in a note about its dry time.)

So, all in all, I highly recommend Zoya's Color Lock System!  Each item of the system is available for individual purchase, or you can buy the whole set.  It looks like the mini set is no longer available, and the full-sized set comes with two additional steps: a ridge-filling base coat and renewing drops meant to revive old, gloopy polishes.  Perhaps some day I will be able to review those for you as well! ;)

PS - be sure to enter my giveaway, which ends tonight (Friday 2/20) at midnight!

February 13, 2015

Black Dahlia Lacquer: Strawberry Fields

Highschooler Me would be freaking out right now.  When I was in high school, I got really, really in to The Beatles (not that I ever didn't love them).  I was also sort of obsessed with strawberries.  My friends occasionally referred to me as Strawberry ShortKate, I had a pink shirt with a large strawberry printed on to it, and one of my friends gave me a giant, blinged-out strawberry necklace for my birthday one year.  My strawberry obsession was one of those things that made total sense at the time, because duh strawberries are yummy and sexy and awesome, but makes me feel kinda silly writing about it as a 23 year old because strawberries are just a fruit.

Here I am, in all my glory on my (how'd you guess?!) 16th birthday.  The scarf and necklace 
were a present that year; there's a picture of me hug-tackling my friend who gave them to me. :)

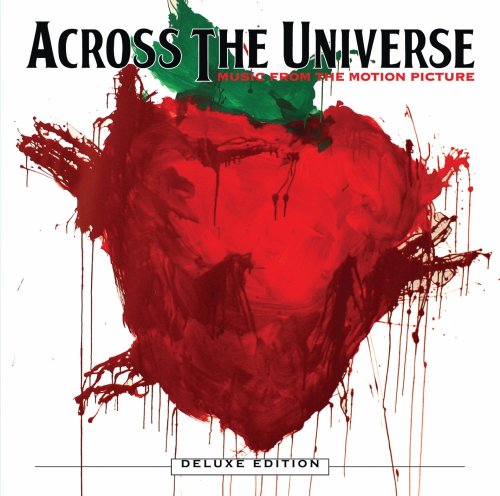
Anyway, the Beatles song Strawberry Fields Forever basically became my theme song.  When I doodled on my notes, I drew melting strawberries a la the movie Across the Universe (which came out in the middle of my intense Beatles obsession).

Sooo, a few weeks ago when checking out Black Dahlia Lacquer's shop for the first time, I came across this polish, and I knew that I absolutely had to have it!

Strawberry Fields is that really great shade of strawberry reddish-pink.  Real strawberries are much more red, but at the height of my strawberry obsession I often drew and doodled strawberries in a pinkish tone.  So I approve of the pinkness of this polish. :)


There is a very fabulous yet subtle pinkish-gold shimmer in this polish.  Part of what makes it so fabulous is how subtle it is!  At certain angles in certain lighting (ie, the dimness that is my basement bedroom) you can't see it at all, but let the light hit it properly and it sparkles beautifully!


Strawberry Fields' formula is very nice.  Very smooth, even coverage, and two coats yielded perfect coverage.


My camera captured this much more neon and pink than it is in person.  I did my best to desaturate it and tone down the redness to make it look more accurate, and I think this photo is the closest.  And you can see the shimmer the best right underneath the word "Dahlia"!  (The photos on BDL's website are very accurate.)

I'm definitely impressed with this polish and adding Black Dahlia to my list of favorite indie brands!  I did purchase another polish from them, but I decided not to put them in the same post.  So look forward to another Black Dahlia swatch+review in the next few weeks!  I also absolutely love their super unique bottle shape.  It just barely fits upright in my Helmer - if it was about half a centimeter taller, I'd probably have to lay it flat in the drawer!


What were your odd youthful obsessions?  Have any of them ever re-appeared in your adult life like mine did?  Let me know in the comments!

February 5, 2015

New Year, New Hue Giveaway!

A few weeks ago, Zoya had an incredible sale called "New Year, New Hue."  You picked out any 3 polishes and got a set of 3 mystery polishes for free plus $15 shipping - or, if you spent at least $25 on other products, shipping was free.  These mystery polishes were promised to be shades that have never been, and will never be, available for purchase.

Upon seeing this announcement, I immediately picked out three colors and paid $15.  Then, when I realized that the 32-oz bottle of Remove+ is exactly $25, I was like well shit, it would be a phenomenal waste NOT to order one of those right now and get 3 more polishes plus another mystery set for free!

So now I'm sitting here with two of these mystery polish sets.  I could keep them for myself and go from "collector" to "hoarder," or I could give them to friends or family... Or I could give them away to one lucky follower!  So that's what I'm going to do, because I love you guys and two and a half months without a giveaway is just too long!!

Since Zoya didn't reveal the colors or the names of the mystery polishes before they shipped out, I'm not going to reveal them before the giveaway, either.  If any of you are completely averse to certain colors, textures, or finishes, well, tough noogies!  Either take the risk that you'll end up with a free color that you don't like or don't take the risk and miss out.  I will tell you that none of these are really colors I would probably ever buy - so if you've seen enough of my posts, you can probably figure out what kinds colors these are NOT.


Giveaway rules:

1. USA addresses only, please.  Sorry to international ladies - I just don't know how to mail nail polish outside the US since it's considered a hazardous chemical.

2. Enter via the Rafflecopter form below.  The only mandatory entries are your e-mail and city/state; all following/sharing entries are optional, but will give you way more chances to win!  (Note that I will not save, sell, or give away your e-mail addresses, and that only the winner will be contacted.)

3. If you choose to follow me via any platform for the giveaway, please don't unfollow the moment it ends!  Unfollowers will be noted and banned from all future giveaways.  Again, you don't NEED to follow me for a chance to win, so if you don't want to follow, don't follow.

4. Giveaway closes on 2/21/15 at 12:00 am EST, and I will draw a winner by 2/22/15 at 11:59 am.  Once the winner is drawn, s/he has 36 hours to get back to me and claim the prize; if I don't get a response by 2/23/15 at 11:59 pm, I will draw another winner.

All right, that's it!  Good luck! :)

a Rafflecopter giveaway